

Table of Contents
- Why Waterproofing Your Camping Tent Matters
- Inspect and Diagnose Where Your Tent Is Leaking
- Clean and Dry Your Tent Completely Before Treatment
- How to Seal Tent Seams Effectively
- Applying Tent Waterproofing Spray to the Rainfly
- How to Waterproof a Tent Floor and Groundsheet
- How Often to Waterproof a Tent and Maintenance Schedule
- Safety and Environmental Precautions During Treatment
- Frequently Asked Questions
Last Updated: October 5, 2026
Why Waterproofing Your Camping Tent Matters
Learning how to waterproof your camping tent prevents leaks that ruin a trip fast. Water seeps through seams, pools on the floor, and soaks your gear. The good news: waterproofing your tent is straightforward and takes just a weekend.
Rain, wind, dew, and temperature swings wear down fabric and coatings, and most tents lose water repellency after one or two seasons of regular use. At Fitness Pro Living, we know gear built to last requires simple maintenance. Understanding how to waterproof your camping tent extends its life by years and keeps you dry when it counts.
This guide covers every step: spotting leaks, cleaning, sealing seams, treating the rainfly, protecting the floor, and knowing when to retreat.
Inspect and Diagnose Where Your Tent Is Leaking
Before treating anything, find out where water actually gets in.
Step 1: Rule out condensation first
Condensation is the most misdiagnosed "leak." It forms when warm, moist air from your breath meets cold fabric, so it appears on the inside of the fly or walls, usually near your head.
Step 2: Run a controlled water test
Fill a spray bottle with clean water. Pitch the tent in bright daylight, close all zippers and doors, and spray the outside slowly from the base upward, one panel at a time.
Step 3: Match the symptom to the failure
Use this table to identify the failure before you buy a product:
| Symptom | Likely cause | Where to look | Correct fix |
|---|---|---|---|
| Drips from ceiling or walls, no trail | Condensation | Interior surface, near head/breathing zone | Improve ventilation; do not seal |
| Drip along a stitched line | Seam failure | Stitched seams on body or fly | Seam sealer |
| Damp floor after rain, no visible drip | Floor seepage or wicking | Floor edges where floor meets wall | Floor treatment + footprint |
| Water beads on fly but soaks through | Lost DWR on rainfly | Fly panels, especially shoulders | Spray-on DWR |
| Drip at zipper | Zipper track or flap failure | Zipper coils and storm flap | Zipper lubricant + seam sealer on flap |
| Pinhole drip in a panel | Fabric abrasion or puncture | Areas rubbed by branches or stones | Patch + spot DWR |
| Dampness only under your sleeping pad | Ground moisture through floor | Floor underside | Footprint + floor treatment |
Step 4: Distinguish seam failure from fly failure
Seam failure shows up as a drip directly under a stitched line, often where the fly attaches to the poles.
Step 5: Check the floor from underneath
Flip the tent or crawl under it on a dry surface. Look for shiny spots, thinning, or pinholes in the floor coating.
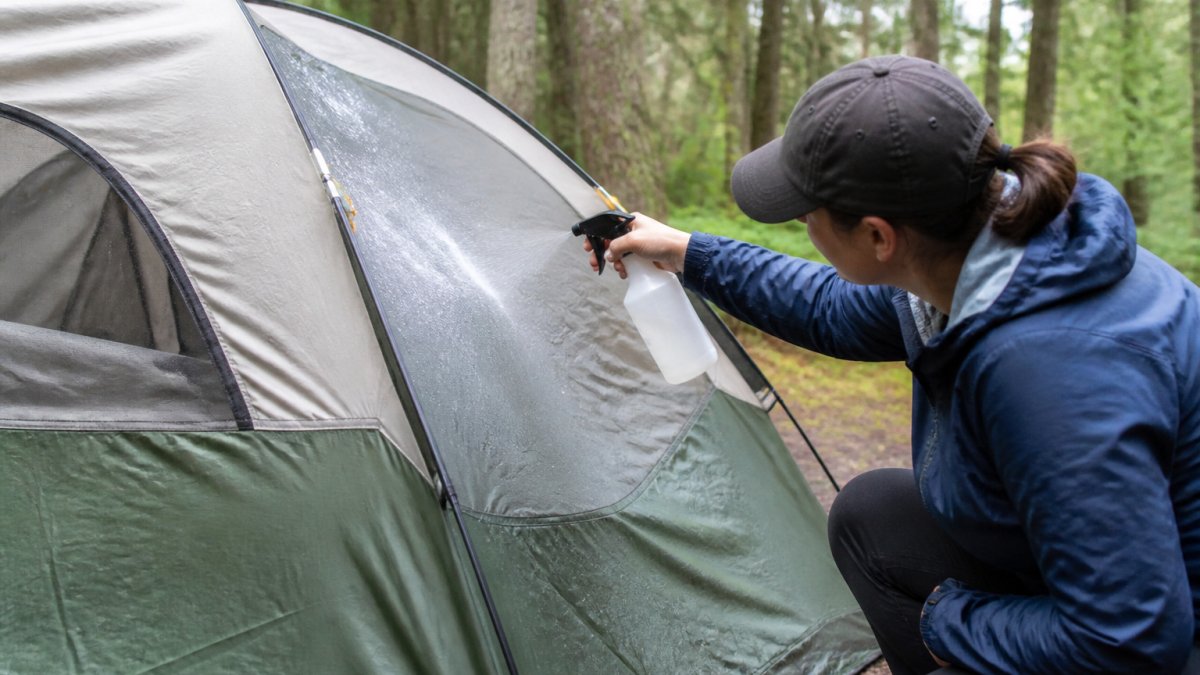
Mark every leak before treating, a 30-minute diagnosis saves you from resealing seams that were never the problem.
Clean and Dry Your Tent Completely Before Treatment
Dirt, mildew, and old coatings block new waterproofing products from bonding properly. You must clean your tent before sealing or spraying.
Cleaning process for different fabric types
Mix a small amount of dish soap into a bucket of lukewarm water. Scrub gently with a soft brush or sponge, focusing on seams, zippers, and stains, then rinse until all soap residue is gone.
For mildew or stubborn stains, increase the soap concentration slightly. Never use harsh chemicals, bleach, or abrasive pads, they damage the coating and weaken waterproof membranes.
Rinse until the water runs clear, leftover soap interferes with seam sealer and waterproofing spray.
Proper drying technique
Air dry completely. Hang the tent in a shaded, breezy location or lay it flat in the sun. Do not use heat, hair dryers, heaters, or direct sunlight for hours can damage the fabric and coatings.
Check that every seam, zipper, and fold is dry, trapped moisture prevents proper sealing.
How to Seal Tent Seams Effectively
Seam sealing is the most important waterproofing step. It stops water from following the stitched holes in your tent fabric.
Seam sealer application steps
Buy a tent-specific seam sealer, liquid or tube. Read the instructions carefully: products cure differently, and some suit polyurethane coatings while others suit silicone.
Apply a thin, even line of sealer along every seam on the tent body, working on a flat surface if possible. For vertical seams, apply bottom to top so gravity doesn't create runs.
Let the sealer cure fully, most products need 24 hours, some longer. Don't use the tent until it's completely cured; partial cure means partial protection.
Curing time and testing
After curing, test the seam with a light spray of water. It should bead and run off, not soak in. If it soaks in, apply a second coat, older tents often need two coats anyway.
Mark the seams you've treated for future maintenance.
Applying Tent Waterproofing Spray to the Rainfly
The rainfly takes the heaviest rain exposure, so keeping it water-repellent is essential.
Identify your coating before you buy anything
Tent fabrics fall into three families, each behaving differently:
- Polyurethane (PU)-coated fabric. The most common tent coating. It feels slightly rubbery and can look shiny. PU coatings work with most PU-based seam sealers and DWR sprays, but are the most prone to hydrolysis, a breakdown that makes the coating sticky, flaky, or smelly over time.
- Silicone-coated fabric. Found on many lightweight and four-season tents. It feels slick and slightly waxy. Silicone coatings repel water well but are hard to re-treat: silicone-based seam sealer and DWR are required, and PU-based products often won't bond. They also can't be seam-taped at the factory, which is why these tents rely on field-applied seam sealer.
- Polyurethane/silicone hybrid or dual-coated fabric. Some tents coat one side with PU and the other with silicone. These need a product labeled for both, or separate treatments per side, a PU-only sealer will not adhere to the silicone face.
If unsure, check the tent's documentation, fabric care tag, or the manufacturer's website. When in doubt, test on a small hidden area and let it cure fully before treating the whole fly.
Spray-on treatment application technique
Lay the rainfly flat on a clean surface in a well-ventilated area and use a tent waterproofing spray designed for your coating type.
Wash-in vs. spray-on: which to use where
- Spray-on is best for localized treatment, spot repairs, and rainflies you can lay flat. It gives you control and lets you avoid zippers and mesh, which some wash-in products can damage.
- Wash-in is best for an entire tent body or floor when you want even coverage and the fabric is removable. It restores repellency from within, but treats everything it touches, including mesh, which some wash-in products can clog or stiffen.
A practical rule: spray the fly, wash-in the floor and body if the manufacturer allows, and never mix product types on the same panel without testing.
Curing and performance testing
After the final coat, let the fly cure fully, typically 24 hours, some products 48, and never pack it away damp.
Manufacturer fabric care and coating identification guidance
Mark the treatment date on tape inside the stuff sack so you know when to re-test next season.
How to Waterproof a Tent Floor and Groundsheet
The tent floor bears your weight and takes moisture from the ground. It needs protection too.
Floor-specific waterproofing methods
Tent floors are typically polyurethane-coated. Spray-on waterproofing works, but wash-in treatments soak into the fabric and restore repellency from within, and many people prefer them for floors because they cover a large flat surface evenly.
Follow the product instructions, some wash-in treatments require soaking the floor in a tub, others apply with a sponge. Let it cure fully, 24 to 48 hours, before using the tent.
Protecting the groundsheet and footprint
A groundsheet or footprint protects the floor from sharp objects and moisture, but it also wears out and loses repellency. Treat it like the tent floor.
Spray-on treatments work well for groundsheets because they're easier to handle than the full tent. Apply 2 to 3 thin coats. Cure fully before packing away.
How Often to Waterproof a Tent and Maintenance Schedule
Waterproofing isn't permanent. Weather and use break down coatings over time.
Reapplication frequency based on use
Tents used every weekend need retreating yearly, monthly tents every 18 months, and casual tents used a few times a year can stretch to two years. Use pattern matters more than calendar time.
Heavy rain, direct sun, and temperature swings speed up coating breakdown, so retreat sooner in harsh conditions.
Signs your tent needs retreatment
The clearest sign is water soaking into the rainfly instead of beading up. A tent that feels damp inside after rain with no visible leak, or fabric with stains and discoloration, also points to failing coatings.
Test with the spray bottle method once a year, if water soaks in instead of beading, it's time to retreat. Catching it early keeps your tent functional for years longer.
Safety and Environmental Precautions During Treatment
Waterproofing products contain chemicals that require careful handling.
Work outdoors or in a well-ventilated space, never in enclosed rooms or tents, where fumes build up. Wear gloves, since repeated exposure to seam sealers and sprays can cause sensitivity.
Let products cure fully before storing the tent indoors, since uncured coatings release fumes. If you're sensitive to chemical smells, wear a respirator while spraying.
Dispose of empty containers per local rules, many products are flammable or contain solvents, so don't put them in regular trash. Check your local waste facility for hazardous material drop-off.
Keep products away from children and pets. Store in a cool, dry place away from heat sources.
| Step | Time Required | When to Do It |
|---|---|---|
| Inspect and test | 30 minutes | Before any treatment |
| Clean tent | 2-3 hours | Before sealing or spraying |
| Dry tent | 24-48 hours | After cleaning |
| Seal seams | 1-2 hours | On first dry day after cleaning |
| Cure seams | 24+ hours | Do not use tent during this time |
| Spray rainfly | 1-2 hours | After seams cure |
| Cure rainfly | 24+ hours | Do not pack away |
| Treat floor | 1-2 hours | After rainfly cures |
| Total time to full waterproofing | 3-5 days | Plan a weekend project |
Waterproofing your camping tent keeps you dry and extends the life of your gear. The process is simple: test for leaks, clean thoroughly, seal seams, spray the rainfly, treat the floor, and let everything cure.
Frequently Asked Questions
How often do you need to waterproof your tent?
Most tents need retreatment every 1-2 years with regular use, or sooner if you camp frequently in wet conditions. Check your tent's water repellency by sprinkling water on the rainfly; if it beads up, the coating is still effective. If water soaks in, it's time to reapply. Wash-in treatments typically last longer than spray-on products, so your schedule depends on which waterproofing method you choose.
Can you waterproof a tent from the inside?
No. Waterproofing products must be applied to the outer rainfly and tent fabric to create an effective water barrier. Applying treatments to the inside can trap moisture and reduce breathability, leading to condensation buildup. Always apply seam sealers, spray treatments, and fabric coatings to the outside surfaces where water actually contacts the tent material.
How do you tell if your tent needs waterproofing?
Perform a simple water test: spray water onto your tent's rainfly and floor. If the water beads up and rolls off, your waterproofing is still working. If water soaks into the fabric or sits in droplets without beading, the water repellency has worn away and you need to reapply treatment. Also inspect seams for visible damage or wear, and check the tent's history, if it's been heavily used or stored in extreme conditions, retreatment is likely overdue.
What's the best way to seal tent seams?
Use a seam sealer product designed for your tent's fabric type (polyurethane or silicone coating). Apply the sealer along the inside seams using the applicator bottle or brush, following the manufacturer's instructions. Work in a well-ventilated area and allow the sealer to cure fully before using the tent, typically 24-48 hours. Test the seams with water before your next camping trip to confirm the seal is effective and watertight.