

Table of Contents
- How to Diagnose a Broken Tent Pole Before You Repair It
- Step-by-Step: How to Splint a Tent Pole in the Field
- What Belongs in a Tent Pole Repair Kit
- How to Repair Fiberglass Tent Poles (and When Not To)
- How to Replace Tent Pole Shock Cord
- Sizing Replacement Sections and Testing Your Repair
- Prevention and Maintenance: Stop the Next Broken Pole
- Frequently Asked Questions
Last Updated: October 14, 2026
How to Diagnose a Broken Tent Pole Before You Repair It
A broken pole is rarely a mystery once you look closely. The trick is matching the damage to the right fix before you start pulling sections apart.
A fractured pole has a partial split, often a hairline crack near a ferrule. A broken pole has separated completely into two pieces.
Here's the quick diagnosis:
- Crack or fracture: splint with a repair sleeve
- Clean break: replace the damaged section
- Bend: straighten only if minor, otherwise replace
The American Camping Association's gear care guidance notes that most pole failures start at the ferrule, where stress concentrates during setup.
Crack, Break, Bend, or Fracture: Match the Fix to the Damage
Run your fingers along the pole and flex it gently. You're looking for three things: a visible split, a sharp kink, or a section that won't seat.
- Crack: a short split, usually near the ferrule. Splint it.
- Fracture: a deeper split that flexes. Splint it, then replace soon.
- Break: two separate pieces. Replace the section.
A crack you ignore becomes a break on the next trip. That's the whole reason diagnosis comes first.
Check the Shock Cord and Ferrule While the Pole Is Apart
The shock cord is the elastic running through the middle of every section. The ferrule is the metal sleeve that joins one section to the next.
Stretch the cord. If it's lost its snap or looks frayed, plan to replace it. Check each ferrule for cracks or a loose fit. A wobbly ferrule means the joint will fail under tension.
Step-by-Step: How to Splint a Tent Pole in the Field
Splinting is the fastest field repair for a cracked or fractured pole, but it is not a universal fix. Here is how to splint a tent pole correctly, plus the limits most guides skip.

Before You Splint: Check That the Pole Is a Candidate
A splint works when the pole is cracked or fractured but still round and mostly straight. It does not work when:
- The pole has splintered lengthwise (especially fiberglass)
- The break is at or inside a ferrule
- The pole is kinked with a sharp crease
If any of those apply, skip the splint and replace the section. A splint over a compromised ferrule or a flattened section will fail under tension, often within minutes of pitching the tent.
Match the Sleeve to the Pole Diameter
Repair sleeves are sized by inner diameter. Measure the outside diameter of your pole with a caliper or by comparing it to a known size. Common tent pole diameters run from about 7 mm to 13 mm. A sleeve that is too loose will slide; one that is too tight will not fit over the damage. If you carry a field kit, include sleeves in the two most common diameters for your tent rather than guessing.
Five Steps to a Field Splint
- Unthread the pole from the tent and separate the damaged section. Work on a flat, clean surface if possible.
- Slide the repair sleeve over the cracked area so it sits centered on the damage. If the crack is near a ferrule, position the sleeve so it bridges the crack and overlaps the ferrule by at least 2 cm.
- Wrap repair tape tightly around both ends of the sleeve to hold it in place. Wrap in overlapping layers and press down firmly. Duct tape works, but dedicated repair tape adheres better in cold or wet conditions.
- Rethread the shock cord through the sleeved section and reconnect the pole. If the sleeve blocks the cord, feed the cord through with a wire hook before taping.
- Test the tension by flexing the pole gently. It should feel firm, not spongy. If the sleeve shifts or the pole creaks, remove the tape and reposition.
When a Splint Is Only Temporary
A splint is an emergency repair. It gets you through the night or back to the trailhead. It is not a permanent fix for three reasons:
- The sleeve adds weight and stiffness that can stress adjacent sections
- Tape adhesive degrades with moisture and temperature swings
- The underlying crack can propagate under the sleeve where you cannot see it
Plan to replace the section or the pole once you are home. If you must rely on a splint for more than one night, inspect it each morning and re-tape if it has shifted.
Post-Splint Testing: Will It Hold?
Before you trust the repair, assemble the full pole and flex it gently. Then pitch the tent and check three things:
- Alignment: The pole should run straight through the sleeve, with no visible bend at the joint.
- Joint fit: The sleeve should not rotate or slide when you twist the pole.
- Tension: The shock cord should pull the sections together firmly, with no spongy feel.
If the repair passes those checks, it is suitable for continued use as an emergency fix. If it fails any of them, redo the splint or replace the section. A repair that creaks or shifts in the yard will fail in the field.
What Belongs in a Tent Pole Repair Kit
A good repair kit weighs almost nothing and saves a trip. Build one around the failures you're most likely to hit.
- Repair sleeves in your pole's diameter
- Repair tape or duct tape wrapped around a pencil
- Spare shock cord cut to length
Store the kit in your tent bag so it travels with the pole it's meant to fix. A kit you left at home is a kit you don't have.
How to Repair Fiberglass Tent Poles (and When Not To)
Fiberglass poles flex well but splinter badly. A splintered fiberglass pole can cut the tent fabric and your hands.
The REI's tent pole repair guide recommends replacing any fiberglass section that has lost its round shape, since a flattened pole will fail the next time it bends.
What most guides miss: fiberglass dust is irritating. Wear gloves and wipe the area clean before you tape.
How to Replace Tent Pole Shock Cord
Shock cord replacement is one of the most common tent pole repairs, but most guides skip the two things that determine success: matching the cord diameter to the pole and setting the right tension. Get either wrong and the pole will either refuse to fold or fall apart mid-pitch. Here is the full process, including how to diagnose whether the cord is actually the problem.
Diagnose Before You Replace
A slack or snapped shock cord is obvious, but a cord that has lost its snap may still be functional. Test it by stretching the cord between two fingers.
Also check the ferrules before blaming the cord. A wobbly ferrule can make the pole feel loose even with a good cord. If the ferrule is cracked or loose, replace the section or the ferrule first.
Match the Cord Diameter
Shock cord is sold by diameter, typically 2 mm, 3 mm, or 4 mm for tent poles. Measure the old cord with a caliper or compare it to a known size. A cord that is too thin will not pull the sections together; one that is too thick will be difficult to thread and may not fit through the pole sections.
Measure the New Cord
Cut the new cord to roughly the pole's full length plus a little slack. A common rule is to add 10-15% to the total pole length. Too much slack and the pole will not stay assembled; too little and you will struggle to fold it. If you are replacing cord on a multi-section pole, measure the assembled length, not the folded length.
Five Steps to Replace Shock Cord
- Cut the old cord at the knot and pull it free. If the cord is frayed, pull it out slowly to avoid leaving fragments inside the sections.
- Measure and cut the new cord at the pole's full length plus 10-15% slack.
- Feed the cord through each section using a wire hook. Work from one end to the other, keeping the sections in order.
- Tie a knot at each end so the cord cannot pull through. Use a figure-eight knot or a double overhand knot for security.
- Reassemble the pole and check the tension as you go. The cord should pull the sections together firmly but still allow you to fold the pole in half without excessive force.
Set the Right Tension
Tension is the most common mistake. Too much tension makes the pole hard to fold and can stress the ferrules. Too little and the pole will not stay together. Aim for a firm pull that still lets you fold the pole in half with moderate effort. If you have to force the fold, the cord is too tight. If the sections separate when you shake the pole gently, it is too loose.
Post-Replacement Testing
After restringing, assemble the full pole and flex it gently. Then pitch the tent and check:
- Tension: The cord should pull the sections together firmly, with no spongy feel.
- Fold test: You should be able to fold the pole in half without excessive force.
- Alignment: The sections should seat fully into the ferrules, with no gaps.
If the pole passes those checks, the repair is durable. If it fails, adjust the cord length or knot position and retest. A shock cord replacement done right will outlast the tent fabric in most cases.
Sizing Replacement Sections and Testing Your Repair
A replacement section only works if it matches. Measure three things before you order:
What to Measure |
Why It Matters |
Typical Range |
|---|---|---|
Pole diameter |
Sleeve and ferrule must fit |
7-13 mm |
Section length |
Must match the pole's fold length |
40-60 cm |
Ferrule size |
Joins sections securely |
Matched to diameter |
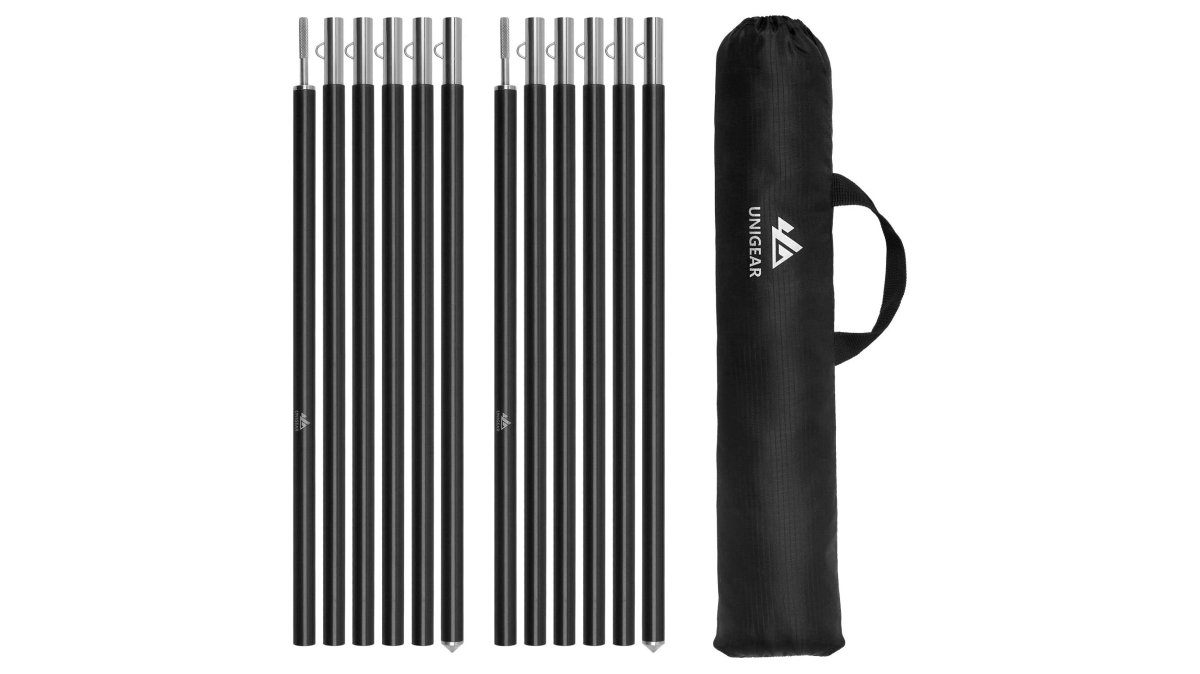
Fitness Pro Living's Adjustable Tent Pole Set uses 7075-T6 aviation aluminum, which is 33.3% more hardness than the commonly used 6061 aluminum alloy, more stable rod body.
Test your repair before you trust it. Assemble the full pole, flex it gently, and set the tent up in the yard. If it holds under tension, it'll hold in the field. If it creaks or shifts, redo the splint.
Prevention and Maintenance: Stop the Next Broken Pole
Most pole breaks are preventable. The National Park Service's camping safety tips stresses proper setup and storage as the two biggest factors in gear longevity.
- Fold poles section by section, never yank them apart
- Clean and dry poles before storage to stop corrosion
- Check ferrules at the start of every season
A pole that's cared for will outlast the tent it holds up. A pole that's ignored will fail on the trip you wanted most.
Frequently Asked Questions
Can you fix a snapped tent pole, or do you have to replace it?
A clean snap in the middle of a section can be fixed with a repair sleeve or splint, which slides over the break and restores enough structural strength for the rest of the trip. A pole that has shattered into several pieces, or where the break sits right at the ferrule, is usually best replaced. If you plan to repair broken tent poles on the trail, carry a sleeve sized to your pole diameter so the fix takes minutes rather than ending your trip early.
Does duct tape work on a broken tent pole?
Duct tape can hold a cracked pole together long enough to finish setting up camp, but it will not carry the bending load a pole takes in wind. Treat it as a temporary repair only. For a fix that lasts the weekend, slide a repair sleeve or splint over the break first, then tape the ends to stop the sleeve from sliding. Check the wrap each morning, because tape loosens in cold and wet conditions.
How do you know when to replace a broken tent pole instead of repairing it?
Replace rather than repair when the pole has fractured in more than one place, when the damage sits at the ferrule or the tip, or when the section no longer threads cleanly into its neighbour. Aluminum sections that have bent sharply should also be replaced, since straightening weakens the metal.
Do I need to replace the shock cord when I repair a pole section?
Only if the cord has lost its stretch or snapped. A tired shock cord makes assembly slow because the sections no longer pull together on their own. Replacing it takes about 15 minutes: cut a new length roughly the same as the assembled pole plus a little slack, thread it through each section, and knot the ends so they sit inside the end sections. If the cord still snaps the pole together evenly, leave it alone.
A snapped pole can end a weekend early, but it doesn't have to. With the right repair kit and a few minutes of know-how, most breaks are fixable on the spot. Fitness Pro Living builds gear made to work better and last longer, from durable tents to the Adjustable Tent Pole Set with 7075-T6 aviation aluminum and a 30-day return guarantee. Shop now and head out with gear you can count on.