

Table of Contents
- How to Prevent Backpack Shoulder Pain: The Essentials
- How to Adjust Backpack Straps for a Secure Fit
- Backpack Weight Distribution: Pack Smart, Not Heavy
- How to Pack a Hiking Backpack to Reduce Strain
- Posture and Positioning: Carry Your Pack Correctly
- Backpack Shoulder Pain Exercises and Recovery
- Choosing the Right Backpack for Your Needs
- When to Seek Medical Attention
- Frequently Asked Questions
Last Updated: October 11, 2026
How to Prevent Backpack Shoulder Pain: The Essentials
Backpack shoulder pain is common among hikers, students, and commuters, but you can prevent backpack shoulder pain entirely within your control. Most cases stem from poor fit, incorrect weight distribution, or weak supporting muscles.
The challenge isn't finding a perfect backpack, it's using the one you have correctly. Proper strap adjustment transfers weight away from your neck and shoulders.
How to Adjust Backpack Straps for a Secure Fit
Getting the fit right takes five minutes. Start with all straps loose, then tighten in a specific order. The key is validating your fit at each step, most people skip this and end up with incorrectly positioned straps.
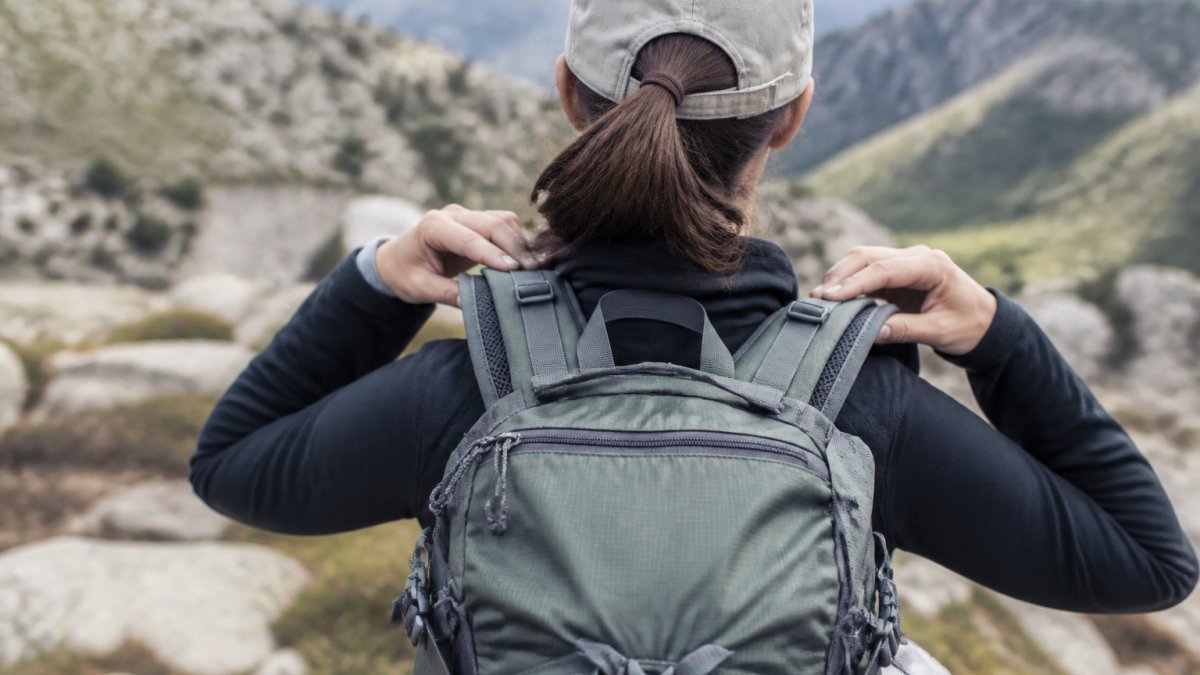
Step 1: Loosen All Straps Before Putting On Your Pack
Before putting on your backpack, loosen every strap completely: shoulder straps, hip belt, sternum strap, and compression straps. This prevents over-tightening and ensures a better fit.
Step 2: Position the Pack High on Your Back
Slip on your backpack and position the top at shoulder height, sitting close to your body. A pack that sits too low shifts weight onto your shoulders instead of your hips.
Fit check: Ask yourself: does the top of the pack sit level with the top of my shoulders? If it's below shoulder height, loosen the shoulder straps and reposition the pack upward before tightening again.
Step 3: Tighten the Hip Belt First
Engage the hip belt before fully tightening shoulder straps, this is the most important step for preventing shoulder pain. Wrap it snugly around your hip bones (not your waist).
Fit check: With the hip belt tightened, try to slide your fingers under the belt at your hips. You should fit one finger comfortably. If you can fit more than two fingers, the belt is too loose.
Step 4: Tighten Shoulder Straps Evenly
Tighten both shoulder straps evenly, snug but not tight. They stabilize the pack, not carry the weight. If your shoulders feel strained, you've gone too far, the hip belt should do 60-80% of the work.
Fit check: With shoulder straps tightened, the pack should sit snug against your back with no gap between the pack and your spine.
Step 5: Attach the Sternum Strap and Adjust Compression Straps
Attach the sternum strap at mid-chest height to connect your shoulder straps and prevent them from sliding outward. Tighten snugly without restricting breathing. Then tighten side compression straps to reduce swaying.
Fit check: With all straps adjusted, put on your backpack and walk around for 30 seconds. The pack should feel like an extension of your body, not something shifting or pulling.
Adjusting for Different Body Types
Most modern packs offer adjustable torso lengths. Shorter torsos (under 5'4") need the shorter setting; longer torsos (over 6') need the longer setting. Narrow shoulders require narrower strap spacing; wider shoulders need comfortable fit without pinching. If your pack doesn't fit your body type, try a different size or model.
Backpack Weight Distribution: Pack Smart, Not Heavy
How you pack your backpack matters as much as how you wear it. Poor weight distribution forces your shoulders and neck to compensate.
Measure Your Load and Know Your Limits
Your backpack should weigh no more than 15-20% of your body weight. If you weigh 150 pounds, your pack should not exceed 22-30 pounds. If you're new to hiking or recovering from shoulder pain, aim for the lower end. Before each trip, ask yourself: do I actually need this item? If not, leave it behind.
Place Heavy Items Close to Your Body
Pack heaviest items in the main compartment close to your back. Organize: bottom (sleeping bag/heavy items), middle (clothes), top (lightweight/frequently accessed gear), side pockets (water/snacks). This keeps weight centered and close to your spine.
Remove Unnecessary Items
Before leaving, remove unnecessary items: extra clothes, duplicate tools, heavy electronics, excess food, and backup items. Removing five pounds significantly reduces shoulder strain.
How to Pack a Hiking Backpack to Reduce Strain
Packing strategy directly affects how weight feels on your shoulders. A well-organized pack distributes load evenly. A poorly packed one creates pressure points and imbalance.
Organize by Weight and Frequency
Place heavy items in the center of your pack, roughly at waist level when worn. This keeps your center of gravity close to your body and prevents the pack from pulling backward.
Items you'll need during the day should be accessible without unpacking everything. Keep a small daypack or side pockets for snacks, sunscreen, and a map.
Balance Left and Right Sides
Check that both sides of your pack feel equally heavy. An unbalanced pack forces one shoulder to work harder than the other, causing uneven muscle soreness and strain.
Camouflage 30" Hiking/Camping Water-Resistant Mountaineer's Backpack →
Distribute weight evenly:
- Heavier items in the center
- Similar weight on both sides
- Nothing hanging off one side more than the other
Spend 30 seconds checking balance before you start your hike. It takes minimal effort and prevents hours of pain.
Posture and Positioning: Carry Your Pack Correctly
Stand tall with shoulders back and chest open. When walking uphill, lean slightly forward from your ankles, not your waist. On flat terrain, maintain upright posture. Take breaks every 45 minutes to an hour; removing your pack for five minutes lets your shoulders and neck recover.
Backpack Shoulder Pain Exercises and Recovery
If you already experience shoulder pain, specific exercises can help. These movements strengthen the muscles that support your shoulders and improve posture.
Stretches to Relieve Upper Back and Neck Tension
Perform these stretches after removing your backpack or before bed:
Neck stretch: Tilt your head toward one shoulder; hold 15-20 seconds. Repeat on the other side. Do three sets per side. Upper back stretch: Cross one arm across your chest and gently pull closer; hold 15-20 seconds. Repeat both sides. Shoulder roll: Roll shoulders backward 10 times, then forward 10 times. Perform daily, especially after wearing your backpack.
Strengthening Exercises for Shoulder Stability
Strong shoulder and upper back muscles reduce pain and improve your ability to carry heavier loads safely.
Rows: Pull light weights toward your ribcage, squeezing shoulder blades together. Do three sets of 10-12 reps. Shoulder press: Press light weights overhead with controlled movement. Do three sets of 8-10 reps. Plank: Hold 30-60 seconds; do three sets. Perform 2-3 times per week for improved endurance and reduced pain.
Choosing the Right Backpack for Your Needs
For weekend trips, the Waterproof Outdoor Camping Hiking 100L Large Capacity Backpack from Fitness Pro Living offers professional load-bearing design with ergonomic padded shoulder straps and 3D suspension. For lighter day trips, the Camouflage 30" Hiking/Camping Water-Resistant Mountaineer's Backpack provides a compact option. Look for padded shoulder straps, adjustable hip belt, sternum strap, breathable back panels, and adequate capacity. Proper fit matters more than brand, try packs on with weight inside.


When to Seek Medical Attention
Most backpack shoulder pain resolves with proper fit, weight management, and stretching. Use this troubleshooting guide to identify whether the problem is fit, load, or posture, or whether it warrants professional evaluation.
Pain Troubleshooting: Location and Timing
Sharp pain on top of shoulders: Loosen straps and reposition pack higher. If pain persists, reduce load by 5-10 pounds. Dull ache across upper back: Focus on standing tall and taking breaks every 45 minutes. If pain persists, do strengthening exercises 2-3 times per week. Pain on one shoulder: Check weight distribution and retighten straps evenly.
Red Flags: When to Stop and Seek Medical Care
Stop wearing your backpack and seek medical attention if you experience:
- Sharp, stabbing pain that doesn't improve with rest or adjustment
- Numbness or tingling in your arms, hands, or fingers that persists after removing the pack
- Swelling or visible deformity in your shoulder, collarbone, or upper back
- Pain that worsens despite adjusting your pack fit, reducing weight, and improving posture
- Pain that persists for more than two weeks even after following all steps in this guide
- Weakness in your arm or hand that wasn't present before wearing the backpack
- Pain radiating down your arm or into your chest
These symptoms may indicate nerve compression, muscle strain, rotator cuff injury, or other conditions requiring professional evaluation. A doctor or physical therapist can assess your situation, perform imaging if needed, and recommend treatment.
When to See a Physical Therapist
If you've adjusted your pack, reduced your load, and done strengthening exercises for 2-3 weeks without improvement, a physical therapist can:
- Assess your posture and identify muscle imbalances
- Prescribe targeted exercises for your specific issue
- Evaluate your pack fit and make personalized recommendations
- Rule out underlying injuries or conditions
Physical therapy is often covered by insurance and can prevent chronic pain from developing.
When to See a Doctor
See a doctor if:
- You suspect a fracture, dislocation, or severe muscle tear
- Pain is accompanied by fever, chills, or unexplained swelling
- You have a history of shoulder injury and pain has returned
- Symptoms suggest nerve compression (numbness, tingling, weakness)
- Pain interferes with sleep or daily activities
Your doctor can order imaging (X-ray, ultrasound, or MRI) if needed and refer you to a specialist.
Frequently Asked Questions
How should a backpack fit to prevent shoulder pain?
A properly fitted backpack sits high and close to your back, with shoulder straps snug but not cutting off circulation. The hip belt should transfer 60-80% of the pack weight to your hips, not your shoulders. Padded shoulder straps and a sternum strap help distribute weight evenly. The pack should feel stable and not sway side to side. Adjust all straps before loading and recheck fit with weight inside.
How much weight should you carry in a backpack?
Most experts recommend carrying no more than 10-20% of your body weight for day hikes and casual use. For multi-day trips, aim for 15-25% maximum. A typical day pack should weigh 15-25 pounds (7-11 kg) when fully loaded. Heavier loads increase pressure on shoulders and neck, raising injury risk. Start by weighing your empty pack, then add items carefully. Remove anything you haven't used on previous trips.
Is wearing a backpack on one shoulder bad?
Yes. Wearing a backpack on one shoulder creates uneven weight distribution, causing the spine to curve and straining one shoulder, neck, and upper back. This leads to muscle soreness, posture problems, and increased injury risk over time. Always wear both shoulder straps to share the load evenly across your shoulders and transfer weight to your hips via the hip belt. This reduces strain significantly.
What exercises help relieve backpack shoulder pain?
Gentle stretches and strengthening exercises ease tension and build resilience. Neck rolls, shoulder shrugs, and doorway chest stretches address tightness. Planks and rows strengthen the upper back and shoulders to better support pack weight. Do these stretches after removing your pack and hold each for 20-30 seconds. If pain persists beyond a few days or worsens, stop and consult a healthcare provider. Prevention through proper fit and lighter loads is more effective than treating pain after it starts.
Backpack shoulder pain doesn't have to derail your outdoor plans. By adjusting your straps correctly, distributing weight smartly, and maintaining good posture, you'll stay comfortable on every hike. Fitness Pro Living backpacks are designed with ergonomic features that make these adjustments easier and more effective. Shop now and start your next adventure pain-free.