

Table of Contents
- How to Pack a Hiking Backpack: The Weight-First Method
- Hiking Backpack Weight Distribution: Where Every Item Goes
- How to Adjust Hiking Backpack Straps for a Stable Carry
- Organizing Gear by Frequency of Use and Accessibility
- Essential Hiking Gear Checklist for Weekend Trips
- Matching Pack Volume to Base Weight and Trip Length
- Waterproofing, External Attachments, and Pack Maintenance
- Conclusion: Pack Once, Adjust Often
- Frequently Asked Questions
Last Updated: October 3, 2026
How to Pack a Hiking Backpack: The Weight-First Method
Learning how to pack a hiking backpack is an exercise in physics, not organization. Get the weight distribution right and a heavy load feels manageable; get it wrong and even a light pack punishes your shoulders.
The core principle: heavy items sit close to your spine and high between your shoulder blades, so the pack's center of gravity stays aligned with your own.
Hiking Backpack Weight Distribution: Where Every Item Goes
Hiking backpack weight distribution means positioning gear so the pack's center of gravity sits high and close to your spine.
Here is the standard layout we recommend:
- Bottom (sleeping system): Sleeping bag and spare clothing in a compression sack or dry bag. Light, bulky items go low.
- Middle (closest to your back): Heavy, dense items like food, cook kit, and water. This is the load's anchor point.
- Top (above the middle): Tent body, stove fuel, or anything you might need during the day.
- Lid and hip belt pockets: Snacks, map, phone, headlamp, sunscreen. These are your day-use items.
- Outside: Only items too bulky to fit inside, secured tightly so nothing swings.
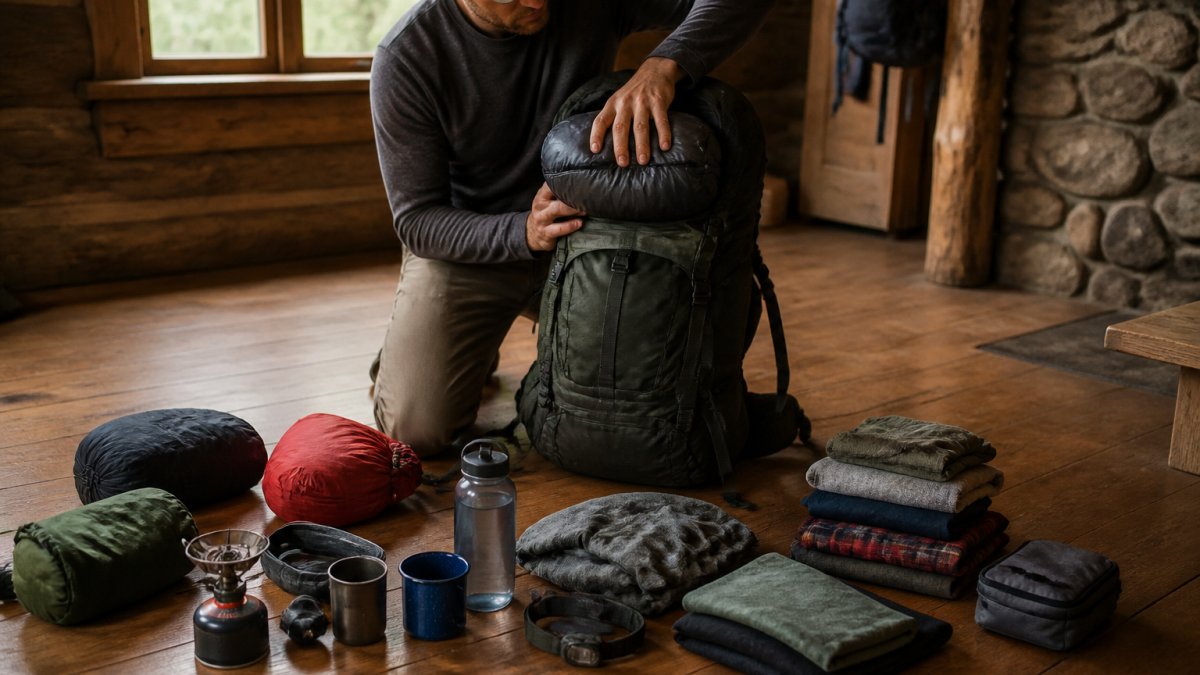
The 1-2-3-4-5-6 Packing Rule Explained
This framework maps your pack into six zones, bottom to top:
- Zone 1, base: Sleeping bag and camp clothes.
- Zone 2, lower middle: Bulky but light gear like a pillow or camp shoes.
- Zone 3, center: The heaviest items, pressed against your back.
- Zone 4, upper middle: Medium-weight gear like your cook system.
- Zone 5, top: Items you want quick access to, such as a rain shell.
- Zone 6, exterior: Tent poles, trekking poles, or a bear canister strapped on.
The rule keeps your center of gravity predictable, so the pack is easier to balance on uneven ground.
How to Adjust Hiking Backpack Straps for a Stable Carry
How to adjust hiking backpack straps correctly comes down to sequence: hip belt first, then load lifters, then sternum strap. Wrong order is the most common cause of shoulder pain, but sequence won't save a pack that doesn't fit, so this section covers both.
Follow this order every time you put the pack on:
- Loosen everything before lifting the pack onto your back.
- Fasten the hip belt so it sits on your hip bones, not your waist. Tighten until the pack's weight rests there.
- Tighten the shoulder straps just enough to keep the pack against your back, not to carry weight.
- Pull the load lifters (the straps at the top of the shoulder harness) to angle the pack slightly forward.
- Clip the sternum strap across your chest at a comfortable height, snug but not restrictive.
Hip Belt, Load Lifters, and Sternum Strap Sequence
The hip belt carries most of the load when fitted correctly, which is why torso length matters more than pack size. The load lifters fine-tune the angle so the pack doesn't pull backward, and the sternum strap stops shoulder straps sliding outward on descents. A common mistake is over-tightening the shoulder straps to compensate for a loose hip belt, that transfers weight straight to your shoulders and causes the exact fatigue you're trying to avoid.
Backpack Ergonomics for Different Body Types
Most packing guides assume one body.
Torso length is the master measurement. Measure from the C7 vertebra (the bony bump at the base of your neck) to the top of your iliac crest.
Hip belt fit differs by body type. A narrower waist-to-hip ratio often makes the belt ride up; look for a conical or curved belt matching the iliac crest angle.
Shoulder width affects the sternum strap and load lifter angle. Narrow shoulders need the sternum strap higher, near the collarbone, so straps don't slide off.
Quick self-check before you leave the trailhead:
- Hip belt sits on the iliac crest, not the waist.
- Shoulder straps rest on the shoulders without a gap under the load lifters.
- Sternum strap sits at collarbone height, not throat height.
Organizing Gear by Frequency of Use and Accessibility
Gear organization by frequency of use separates a pack you enjoy carrying from one you fight all day: items you reach for most go in the most accessible pockets, items you need once a day go deep.
Sort your gear into three tiers before you pack anything:
- Constant access: Water bottle, snacks, phone, map, sunscreen, lip balm.
- Frequent access: Rain shell, first aid kit, headlamp, bug spray.
- Rare access: Sleeping bag, spare clothes, camp stove, repair kit.
A hydration bladder belongs in the dedicated sleeve against your back, hose routed over your shoulder. Keep day-use items in hip belt pockets and the lid so you never unload the main compartment on the trail.
Essential Hiking Gear Checklist for Weekend Trips
An essential hiking gear checklist for a weekend trip covers four categories: shelter, sleep system, kitchen, and safety. Weigh everything before it goes in, and leave behind anything you didn't use last trip.
| Category | Items | Where It Goes |
|---|---|---|
| Shelter | Tent, stakes, footprint | Top or strapped outside |
| Sleep system | Sleeping bag, pad, pillow | Bottom of main compartment |
| Kitchen | Stove, fuel, pot, spork, food | Middle, close to spine |
| Safety | First aid kit, headlamp, map, emergency blanket | Lid or hip belt pocket |
| Water | Hydration bladder, filter or tablets | Bladder sleeve, filter in lid |
| Clothing | Rain shell, spare socks, insulating layer | Top, accessible |
| Navigation | Map, compass, charged phone | Hip belt or lid |
Your emergency kit and first aid supplies should always be in a fixed, memorable spot. If you have to think about where they are, they're in the wrong place.
Matching Pack Volume to Base Weight and Trip Length
Pack volume should match your base weight and trip length, not your ambition. A weekend trip rarely needs more than 50 to 60 litres, and ultralight setups can drop to 40 litres or less.
Here's how we'd size it:
- Overnight, ultralight: 30 to 40 litres, base weight under 7 kg.
- Weekend, traditional: 50 to 65 litres, base weight 9 to 14 kg.
- Multi-day packing (3 to 5 nights): 65 to 80 litres, base weight 14 kg and up.
Weight-to-volume ratio optimization is the real skill: dense items like food and fuel take little space but add weight, while sleeping bags and jackets take space but weigh almost nothing.
Waterproofing, External Attachments, and Pack Maintenance
Waterproofing starts from the inside out. Use dry bags or a pack liner for anything that must stay dry, then add a rain cover outside. Liners protect against immersion and prolonged rain; rain covers handle sudden showers. A wet pack can gain several pounds, so waterproofing is weight management, not just comfort.
Packing for Extreme Weather: Winter, Desert, and Wet Climates
Most guides stop at "bring a rain cover." Extreme conditions demand different packing logic because the risks shift, from wet gear to frozen gear to heat exhaustion.
Winter and snow: Freeze protection matters more than waterproofing.
Desert and hot climates: Water is the heaviest item you'll carry, so weight distribution matters more than volume.
Wet and humid climates: Assume everything gets damp.
External Attachments and Load Stabilization
For external attachments, use compression straps to lock down anything strapped outside. A bear canister or tent poles belong on top or at the sides, never dangling where they can catch on branches. Loose gear swings, shifts your center of gravity, and throws off load stabilization.
A few concrete rules:
- Trekking poles: strap them vertically on the side, tips down, so they don't catch on brush.
- Bear canister: top of the pack, centered, with the lid facing up for quick access at camp.
- Tent poles: side compression straps, parallel to the pack body.
Weight-to-Volume Ratio Optimization
Weight-to-volume ratio optimization is the math most beginners skip.
Think of gear in two buckets:
- High density (heavy, small): food, water, fuel, batteries, tools. A liter of water weighs 1 kg; a day of food weighs roughly 0.7-1 kg.
- Low density (light, bulky): sleeping bag, puffy jacket, spare clothes, sleeping pad.
Fill the low-density volume around the high-density core. Bottom-heavy means dense items are too low; top-heavy and tipping backward on descents means they're too high.
A simple test: pack your bag, then lift it by the top grab handle with one hand. If it hangs vertically without tipping, the weight is centered.
Post-Hike Maintenance and Storage
Post-hike maintenance is the step almost everyone skips. Empty every pocket, wipe the interior, check the suspension system for frayed stitching, and store the pack loosely in a dry place rather than compressed.
A simple routine after every trip:
- Empty and shake out the pack, crumbs and grit attract moisture and pests.
- Wipe the interior with a damp cloth; for odors, a mild soap and water rinse, then air dry out of direct sun.
- Check zippers and buckles for grit; a toothbrush clears debris from zipper teeth.
- Inspect the hip belt and shoulder straps for compressed foam or frayed webbing.
- Store loosely, hang by the haul loop or lay flat. Never store compressed in a stuff sack; foam and padding lose their shape.
- Loosen all straps before storage so elastic and webbing don't take a set.
A pack cleaned and stored correctly can last a decade of weekend trips; one shoved in a garage compressed and damp often needs replacing in two or three seasons.
Conclusion: Pack Once, Adjust Often
Even a perfectly packed backpack needs adjustment as the day goes on: straps loosen, food gets eaten, the load shifts. Recheck your hip belt and load lifters every couple of hours, especially before a long climb or descent.
If you're still searching for a pack that carries comfortably from the first kilometre, Fitness Pro Living builds hiking backpacks and camping gear designed to hold up on real trails, not just in the store.
Frequently Asked Questions
What is the 1-2-3-4-5-6 packing rule for a hiking backpack?
The rule is a memory aid for load order: 1) heaviest items closest to your spine and mid-back, 2) medium-weight gear above and below them, 3) lightest items at the bottom, 4) items you need during the day near the top or in lid pockets, 5) water and snacks within easy reach, and 6) emergency kit in a fixed, known spot. The point is to keep the pack's center of gravity close to your own so the hip belt carries the load instead of your shoulders.
How do I distribute weight so my shoulders stop hurting?
Start with hiking backpack weight distribution: place the heaviest items, like your sleeping system and food, in the middle of the pack against your back. Tighten the hip belt first so it sits on your hip bones, then adjust load lifters to pull the pack closer to your shoulders, and finish with the sternum strap. If your shoulders still ache after an hour, your torso length or hip belt position is likely off, not the packing itself.
How heavy should a 3-day hiking pack be?
A common target for a three-day trip is roughly 20 to 25 percent of your body weight, including food and water. Ultralight setups with a low base weight can come in well under that, while traditional gear with a heavier tent and sleeping system sits higher. Weigh your packed bag before you leave, then remove anything you did not touch on the previous trip.
What should stay out of my backpack on a hike?
Leave behind cotton clothing, extra pairs of shoes, full-size toiletries, and duplicate tools. Cotton holds sweat and rain, dries slowly, and adds weight with no warmth benefit. Heavy camp chairs, glass bottles, and large cooking kits are also common culprits. Pack one small repair kit, one first aid pouch, and one water treatment method instead of several backups, and check the weather before deciding on layers.
The trail rewards preparation, and a well-packed, well-fitted backpack is where that preparation starts. Fitness Pro Living offers durable hiking backpacks, tents, and camping essentials built for comfort on long days and reliability on every trip. Explore our range of outdoor gear and pack smarter for your next adventure.